Windows 10 now controls settings for graphics cards, meaning that tools like the NVIDIA control panel no longer allow you to configure apps to run on your graphics card.

To set up your graphics card for Fusion 360 on Windows 10, follow these steps.
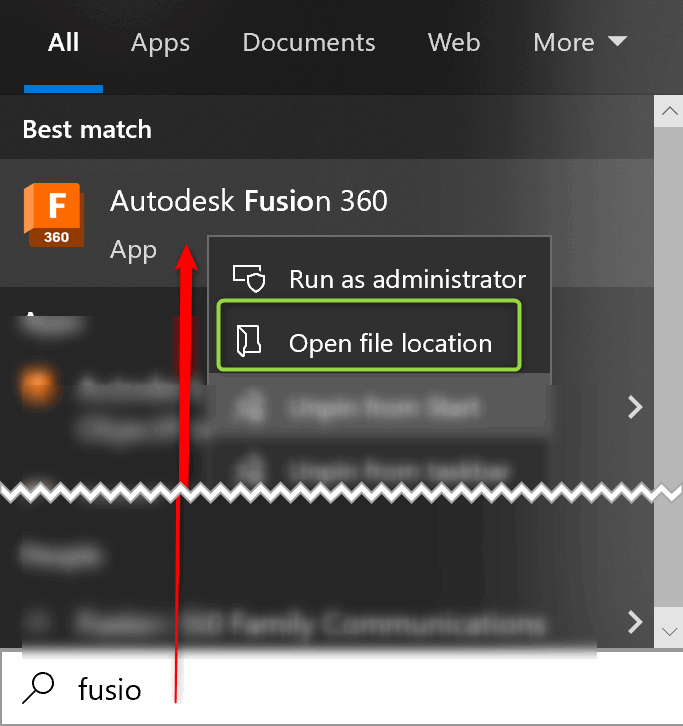
First off, launch Graphics settings by typing “Graphics” into your search bar (bottom left on your Windows Taskbar)

Copy this location to your clipboard

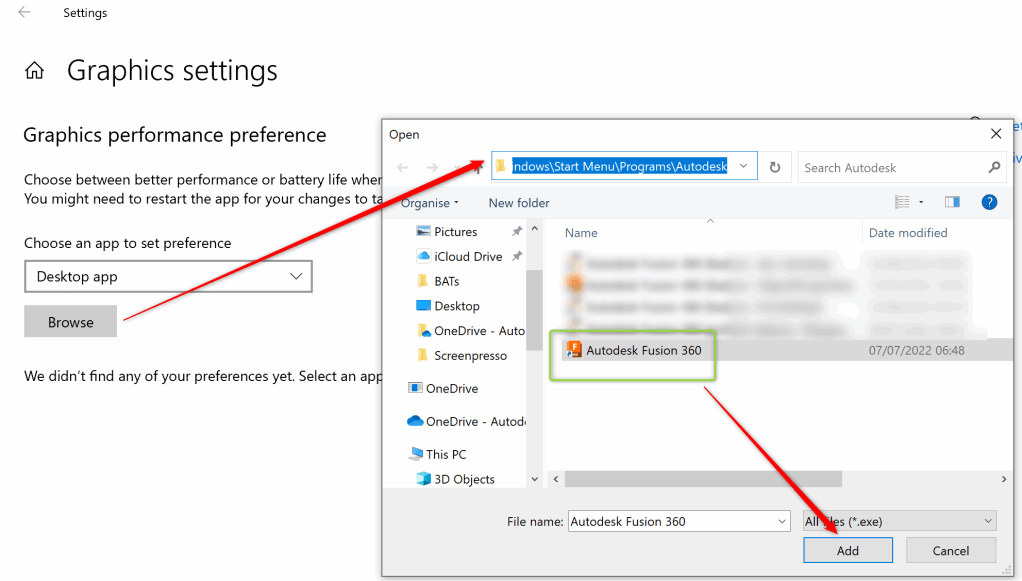
In “Graphics Settings”, click “Browse”, now paste the contents of your clipboard into the path shown below. You should now be able to find Fusion360. Select Fusion 360 and click “Add”
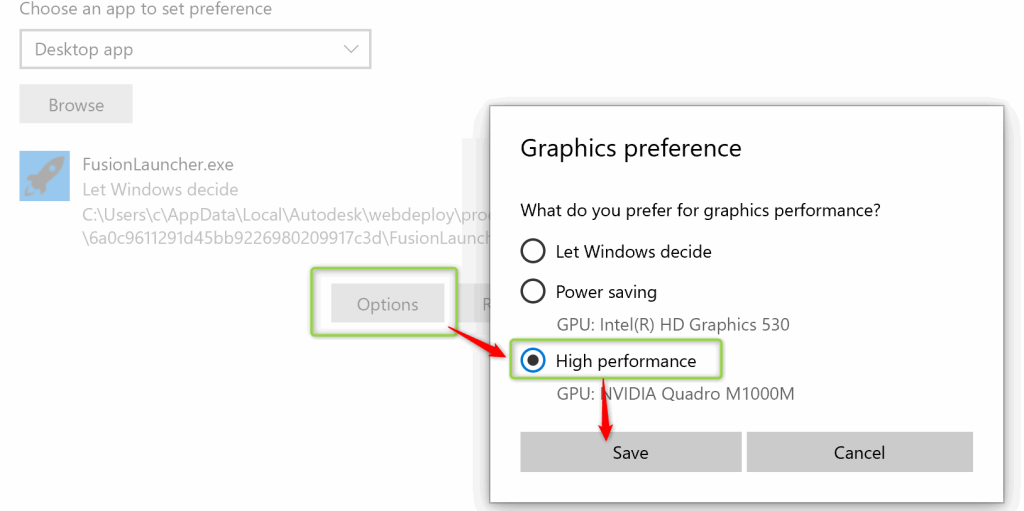
The final step is to click on “Options” then ensure that “High performance” is checked, click “Save”, fire up Fusion and you should be all set with the “High performance” graphics card.
It is also possible to find the application by browsing directly to a desktop shortcut.
Here’s an animated GIF of the process, but this time using the desktop shortcut.

NEXT: add “AcCoreConsole” to High Performance under graphics settings.
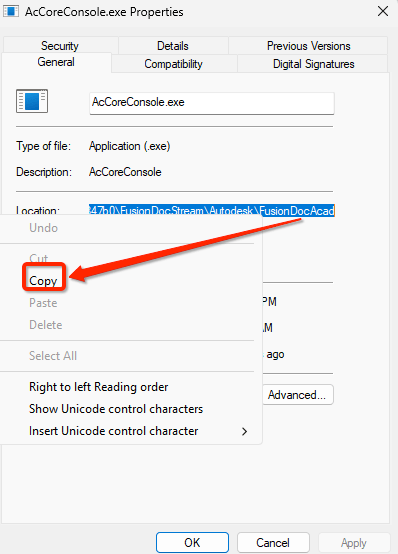
The easiest way to find the location of this application, is to go to the task manager, then to expand Fusion 360, under Fusion, you will see “AcCoreConsole”, right click it and choose Properties.

Now highlight the “Location”, then right click it and copy this to your clipboard.
Following the steps above for Fusion, now add “AcCoreConsole” to your graphics settings as high performance. Top Tip, when browsing for the app, use the location that you have just copied to your clipboard.

One last consideration, is that the location of both “Fusion Launcher” and “AcCoreConsole” will change with each update of Fusion, so you may need to repeat this process at a later date.

You must be logged in to post a comment.