
Virtual components are one of Inventor’s hidden gems. In an Assembly file, you are able to add these “empty” virtual components into your assembly. The reason you would do this, is that you may have components that you cannot model, which are needed on your BOM, such as grease.
These virtual components are fully contained inside of the Assembly file (no separate .ipt file is created). Virtual components do not contain any geometry.
To create a virtual component, from the “Assemble” tab click on “Create” and then give your new component a new name, make sure to tick the “Virtual Component” check box.
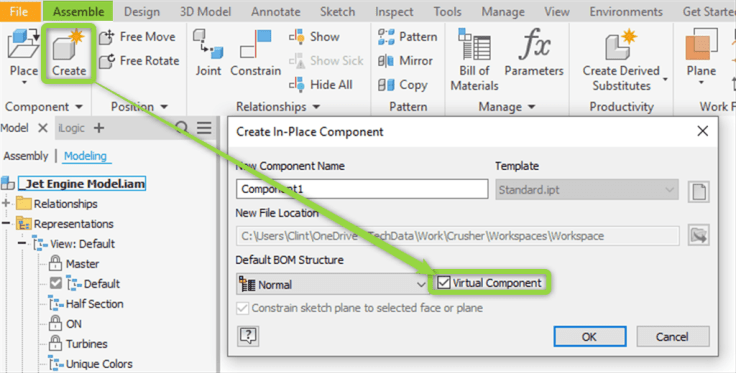
The virtual component is added to your model browser, note that the icon is different to a normal component.
The virtual component will show on your BOM, note that it will not have a thumbnail (and you cannot assign one).
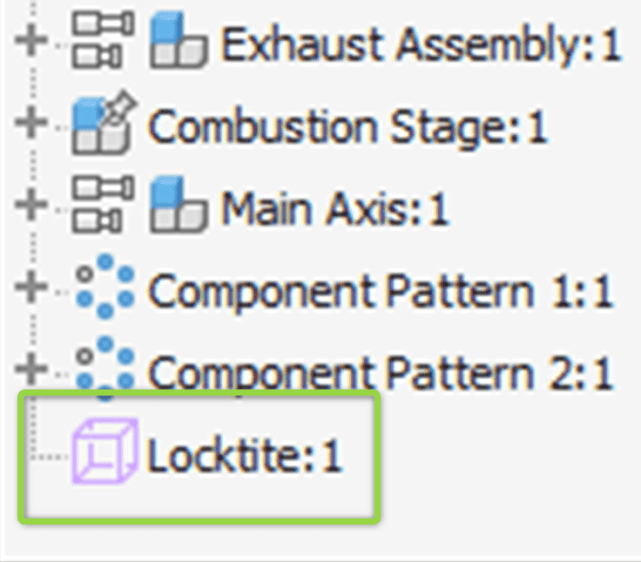
If you require several instances of a virtual component, there are a couple of options, one is to override the quantity in the BOM. The other option is to do a component pattern of the virtual component. As a bonus, you could tidy these up, by adding them to an assembly folder.

Just like a normal Inventor part, the virtual component has a fully set of iProperties. These can be manipulated to include a Mass, Material, part number etc.

Here’s the magical part; as virtual components don’t exist (they are part of the Assembly file). You can save them in your template files. A hypothetical situation, is that you could have different template files saved, based on the type of assembly you are creating i.e. one that uses a carton and one that uses a crate.
Another use case, is that you might want to create an assembly that you will re-use as a sub assembly. An example being an assembly called “Production Consumables”, this assembly file would contain a set of virtual components like Locktite, Grease, Oil, etc. Adding this to your top level assembly would ensure that your BOM is accurate.
I’ve also written come iLogic code to automate the creation of virtual components, check that out here.

You must be logged in to post a comment.